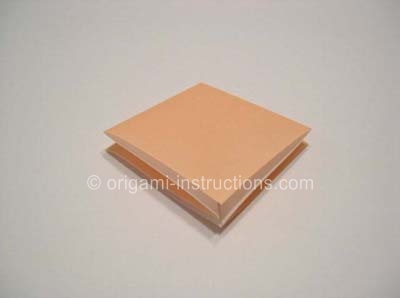
Making of a square base:
 |
| Step 1 |
 |
| Step 2 |
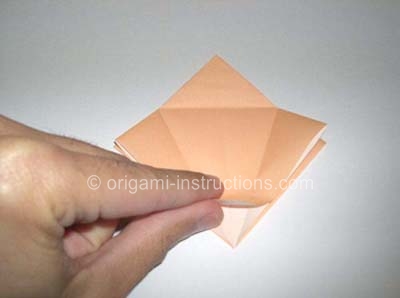
Step 3: Bring the top flap over to the right and
open the paper slightly. We'll now make a squash fold by...squashing
down the paper!


Step 4: FLIP paper over.

Step 5: Now bring the flap from right to left. Open up the flap and make a squash fold.


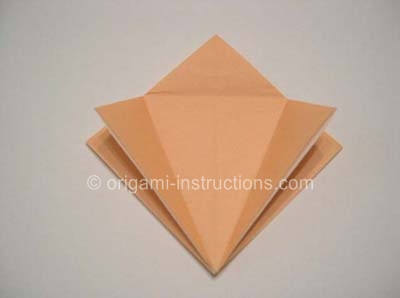
Making of bird base :
 | |
| Step 1 |
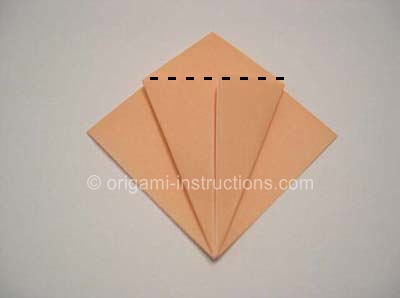
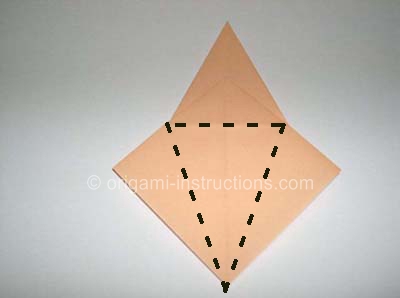
Step 2: Fold the corners inwards as shown in the next two
photos. Crease well and unfold. The creases are very important so go
over them once, twice, three times.

Step 3: Fold down the tip. Once again, crease well and unfold.
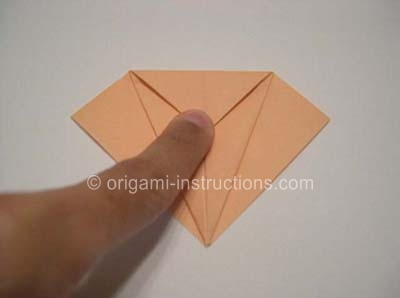
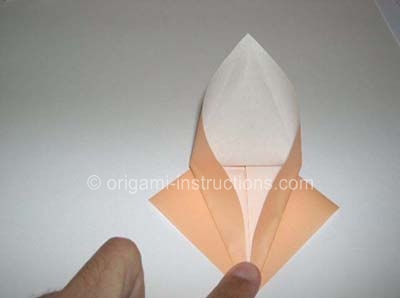
Step 4: The 3 creases we've made in the previous steps will help us make the petal fold. If you've creased well, then the paper will "co-operate" and you can complete the fold rather easily. If you didn't crease well, it will be harder to get the paper to fall in place.
Lift the bottom
corner upwards, and fold along the crease lines as shown and flatten to form a triangle..
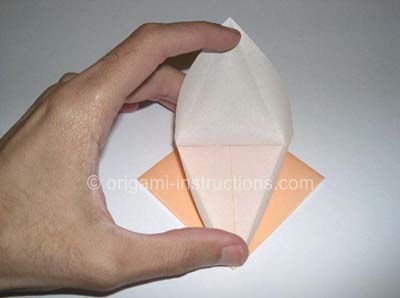

Step 5: Your bird base is now half-done. Flip the piece
over.

Step 6: We'll repeat Steps 3 and 4 on this side. Fold in the
three corners on this side to make crease marks. Once again, make sure
to crease well then unfold.

Step 7: Now lift the bottom corner and do another petal fold.

Now your bird base is complete!

Making of Dinosaur :
Fold corner A of the bird base downwards as shown below.
 |
| Step 1 |
 |
| Step 2 |
Step 3: Now fold the model in half along the long axis. Then rotate it 180 degrees counter-clockwise:


Step 4: Next is a reverse outside fold to move corner B to a vertical position:

Step 5: And do a reverse outside fold to start forming the head of the dinosaur, and an inside reverse fold to complete it.


Step 6: An inside front fold forms the animal's front legs.
Fold corner C downwards to form one of the rear legs...


Step 7: ...then repeat on the backside to form the other leg.
Then crease each of the rear legs as shown, and do a crimp fold to form
the feet:


Step 8: Now fold the lower part of the body inside, to slim the creature down a bit:


And there you have it, a fearsome origami-dinosaur!

This is one well-loved origami and we've received many photos from readers who've folded it. Fold one yourself, show your friends! RAWRRRRR!!!!
NURAV's CALL:
Friends I bet you loved making this tiny dinosaur. To enjoy making more stuff like the one above, log on to http://www.origami-instructions.com/
So happy folding.......
No comments:
Post a Comment